The Requisition Move Order
A Requisition Move Order is used to transfer material from one location to another with some documentary evidence for the transaction. The move order document differentiates this transaction from a simple subinventory transfer.
A Demo for Office Smart Solutions
Travis, the Inventory Management track lead at Office Smart Solutions (OSS), has requested Jennifer who is the lead consultant for the Inventory module, for a demonstration of how move orders can be implemented with an approval system. As happens in almost every implementation, this is essentially a decision point that escaped everyone’s notice. Unfortunately, the consulting team at OSS had overlooked the fact that they need to inform the track leads at OSS of the approval feature that has been provided for move orders. Fortunately, this oversight has been noticed by Travis even before they begin implementing move orders. Hence, the request for the demo in the Vision instance.
FREE Trial Download!
The Start to End Video Guide to Implementing Oracle Inventory in R12

This version will help you explore and review the COMPLETE Video Tutorial... ALL 87 videos, for 1 Trial and 1 Day.
Once you like the Tutorial, select from any of the Subscription options here, to get your copy of the eLearning Video.
FREE Download
Detailed Course Topics for the Start to End VIDEO Tutorial

Defining Employees
Jennifer has performed some setups in the Vision instance to create her demo. She has identified two material planners from the Office Smart Naperville plant OSN. They are Steven Hall and Simon Buckner. She defines these two individuals as employees using the Human Resources responsibility.

Defining Steven Hall and Simon Buckner as users
This is more of a system administration task but Jennifer needs to carry it out because it is a mandatory step in her demo. Jennifer defines these two individuals as users in her Vision instance and assigns their respective employee names in the Employee field. She then assigns the Inventory responsibility to each of them.
Defining Item Planners
Jennifer then decides to add Simon Buckner as an item planner using the Inventory Responsibility. It is not necessary to associate the name of an item planner with an employee defined in HR. However, the advantage of doing so is distinct in that the employee can receive notifications through Oracle Workflow whenever there is a Move Order (or any other document that has an approval workflow) awaiting his review/approval. This is the approach that Jennifer intends to demonstrate.
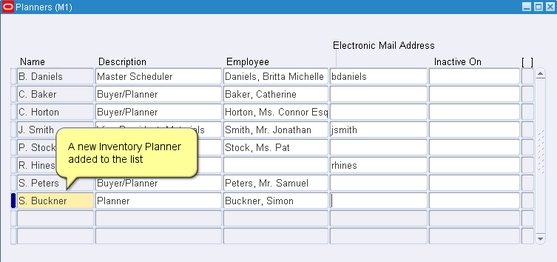
Jennifer has defined an item called the Linear Hub in the Vision org M1. She then proceeds to assigning Simon Buckner as the planner for this item.
Time to request a material transfer
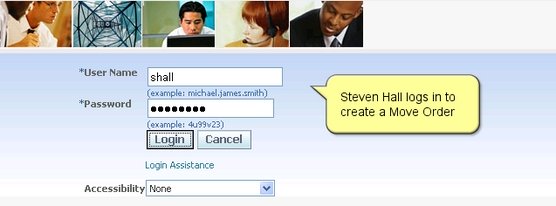
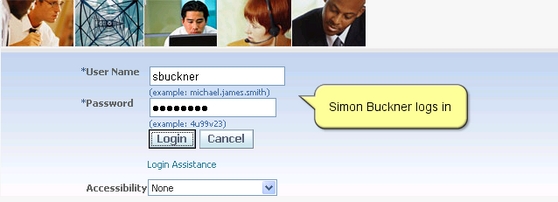
Steven Hall is in need of the item LH101. He knows that he has to raise a move order to request this material from its planner. So, he logs into apps as shown below
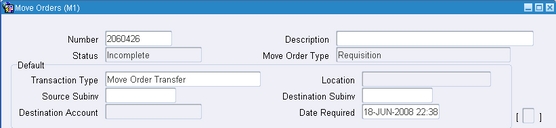
When creating the Move Order he has to select the Transaction Type as Move Order Transfer. The Move Order Type defaults as Requisition as shown below.
At the move order line level, there are four tabs:
Since Office Smart Naperville is not a project enabled organization therefore, theProjects and Tasks tab is of no relevance to Steve.
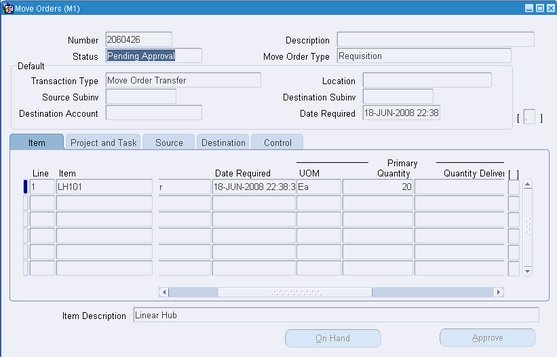
In the Item tab, he specifies the item code, quantity needed to be transferred, the unit of measure and the required date. Steve wants 20 units of LH101.
In the Source tab Steve needs to specify the source subinventory from which the material will be drawn. However, he is not sure as to which subinventory has adequate on-hand balance of the item LH101. So he uses the On Hand button to call the Material Workbench. He finds that Stores is the only subinventory in the M1 organization that has the item LH101.

There is a stock of 100 units of LH101. Steve needs 20. So he selects the Storessubinventory as the source subinventory.
In the Destination tab, Steve selects the Floorstock subinventory as the final location where the material needs to be transferred.
Initiating the Move Order Approval Process
Finally, Steve clicks on the Approve button to launch the approval process. The Move Order goes into Pending Approval status as seen below.
At this point Steven Hall logs out and waits for further action on his move order.
Now, Simon Buckner logs in.
Upon logging in, Simon is greeted with a notification from Steven Hall that says Line 1 of Move Order 2060426, requires your Approval.
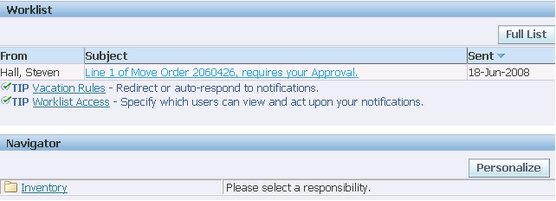
Simon clicks on the Subject line link to open the notification.
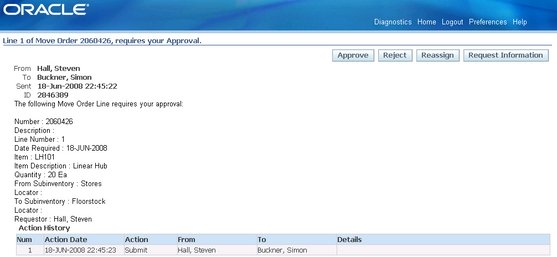
The notification essentially contains a summary of the move order with the following four options for action:
Simon clicks on the Approve button to signal his consent for the transaction. Upon doing so, the notification disappears from Simon’s Worklist.
In the real world, at this point Simon may choose to call Steve and communicate to him the approval of the move order. However, this is optional as Steve will come to know of this the moment he logs in.
Transacting the Move Order
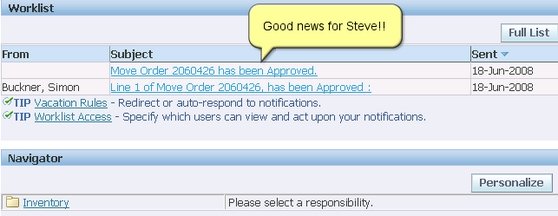
Steven Hall logs in again. He finds that Simon has approved his Move Order.

A Point to Ponder
Why do two lines of notifications appear for the same move order?It is because a move order may comprise multiple lines with varying item, required date, source and destination subinventory combinations. If the lines have items that are assigned to different material planners then material planner A may get a notification to approve Line 1 while material planner B would get a notification to approve Line 2, and so on.
Similarly the creator of the Move Order would get a notification for each line that gets actioned, such as an approval for Line 1 and rejection for Line 2.
If Steve queries the Move Order at this point, he will find that the status has changed to Approved.
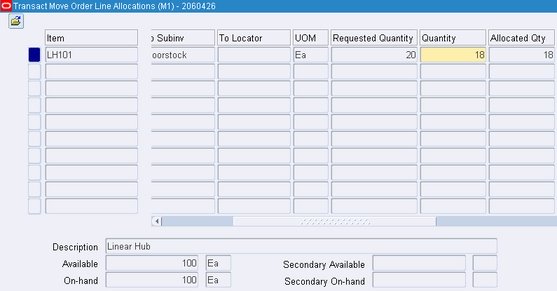
So, Steve can move onto the Transact Move Orders form. In this form, Steve chooses to allocate or reserve his 20 units of LH101. To do so, he clicks on theAllocate button. Having done so, he may decide that he needs only 18 units, instead of the need for 20 units that he had anticipated earlier. He uses theView/Update Allocations feature to change the Quantity from 20 to 18. Accordingly, the system adjusts the Allocated Qty to 18. The Requested Quantity however retains the original figure of 20.
To enable his material handlers to physically move the material, Steve has to give them some instructions. So, he launches the Move Order Pick Slip program by selecting the Print Pickslip option from the Tools menu.

Steve’s pick slip shows that 18 units of item LH101 are pending movement from the Stores subinventory to Floorstock subinventory. This information tells the material handler he needs to physically move these parts. The pick slip also shows that 2 units of LH101 remain Unallocated.
Steve clicks on the Transact button to transact the move order.
This results in 20 units of LH101 being deducted from the on-hand balance in the Stores subinventory and the same quantity added to the Floorstock subinventory.
The Material Workbench will prove that this material transfer has indeed taken place.
This completes Jennifer’s demo.
Next: The Replenishment Move Order
Return to Oracle Inventory from The Requisition Move Order

Join our Network!
It's FREE!